Good Morning! I've got a pretty Valentine's Day card to share with you today for the White Rose Crafts February 2019 Sketch Challenge. Upload a photo of a new card you've made using our sketch below to the challenge album by 11:59pm on February 22, 2019 for a chance to win a $15.00 e-gift card to the White Rose Crafts store! Plus, you could have your project featured on the WRC blog! How cool is that?
~~~~~~~~~~~~~~~
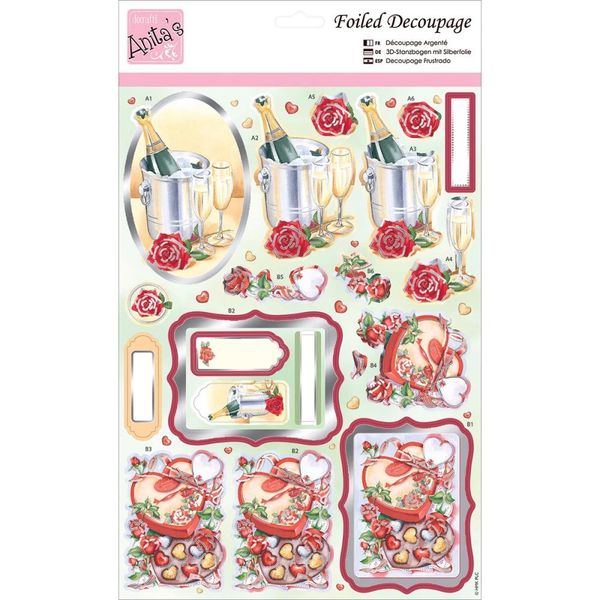
I started by popping out the main chocolate box image from the Anita's Heart Shaped Chocolates pop-out decoupage sheet, as well as the B3, B5 & B6 images from the sheet--I like to split up the decoupage elements to be able to make two cards with a little bit less dimension. Then I trimmed the large image to 2 1/4 x 3 1/4 inches, because I didn't want the frame that was built into the image. I mounted the base image onto white cardstock cut to 2 3/8 x 3/8 inches using double sided sticky tape. I added the 3D elements using Woodware 1mm Foam Mounting Tape, to give the design dimension.
Next I cut a 4 1/8 x 5 3/8 inch panel of Wine Cup Petallics shimmer carstock and adhered it to a top folding, A2 white card base. I cut a 3/4 x 4 1/8 inch strip of gold metallic cardstock, from my stash, and adhered it just south of the center of the card. I added the decoupage panel with double sided sticky tape.

 |
| February 2019 Sketch |
~~~~~~~~~~~~~~~
I started by popping out the main chocolate box image from the Anita's Heart Shaped Chocolates pop-out decoupage sheet, as well as the B3, B5 & B6 images from the sheet--I like to split up the decoupage elements to be able to make two cards with a little bit less dimension. Then I trimmed the large image to 2 1/4 x 3 1/4 inches, because I didn't want the frame that was built into the image. I mounted the base image onto white cardstock cut to 2 3/8 x 3/8 inches using double sided sticky tape. I added the 3D elements using Woodware 1mm Foam Mounting Tape, to give the design dimension.
Next I cut a 4 1/8 x 5 3/8 inch panel of Wine Cup Petallics shimmer carstock and adhered it to a top folding, A2 white card base. I cut a 3/4 x 4 1/8 inch strip of gold metallic cardstock, from my stash, and adhered it just south of the center of the card. I added the decoupage panel with double sided sticky tape.
I took the stacked "Love you more" sentiment from the sold out Whatcha' Saying stamp set by Heffy Doodle and cut it apart to use as a side by side sentiment, and stamped it on a white scrap of cardstock with Versafine Clair Nocturne ink. I then cut the scrap to 3/8 inch wide and backed it with a strip of 1/2 inch gold metallic card. I adhered it below the decoupage panel with Woodware 1mm foam mounting tape. I selected the 3 rose images from the Heart Shaped Chocolate decoupage sheet (2 of them are meant to go with the champagne bottle image.) I put foam tape on the back of all 3, and adhered them in the corners as embellishments. As a final touch, I added some of the sequins from the exclusive Doodles Paper Playground: Sparkle Blend, With Love, available only in the February Love Story subscription card kit.
~~~~~~~~~~~~~~~~
I hope you enjoyed my card today. I really love all of that dimension I get by using pre-cut decoupage sheets. This card came together super fast, and I have enough decoupage elements left to make 3 more, 3D cards--which is an awesome value for $1.00 per sheet!
~~~~~~~~~~~~~~~~
Thanks for stopping by the blog today!
Happy Crafting!


No comments:
Post a Comment